Container Configuration in Hippo CMS
What is Container ?
Container is an modifyable section in your page in which Webmaster can modify there contain in page using Channel Editor. Containers are Stotred in hst:workspace we can configure in
1. below hst:workspace/hst:pages or
2. below hst:workspace/hst:containers
so in this blog we configure container below hst:workspace/hst:containers.
Steps to create Container in Hippo CMS.
Step 1: Create a New Project
generate your Hippo project using the Maven archetype as explained in Create the Project.
Step 2: Build the Project
Compile and run the project by using the following Maven commands:
mvn verify
mvn –Pcargo.run
Step 3: Create a Jsp File
Create a jsp file under your_project_name/site/src/main/webapp/WEB-INF/jsp/your_project_name/home.jsp
Add the line inside the home.jsp file
<%@ taglib prefix=”hst” uri=”http://www.hippoecm.org/jsp/hst/core” %>
<hst:include ref=”main”/>
Step 4: Configure the Template
Browse to the Hippo Console at http://localhost:8080/cms/console and log in using the default admin / admin credentials.
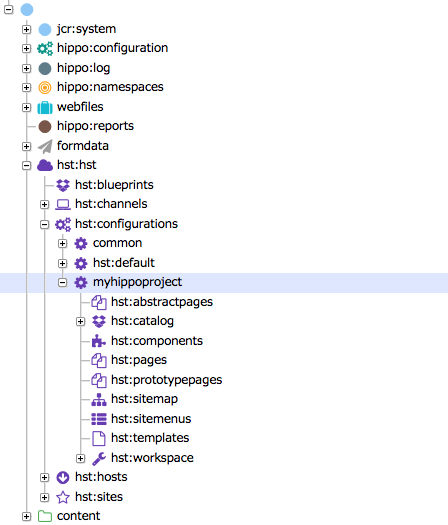
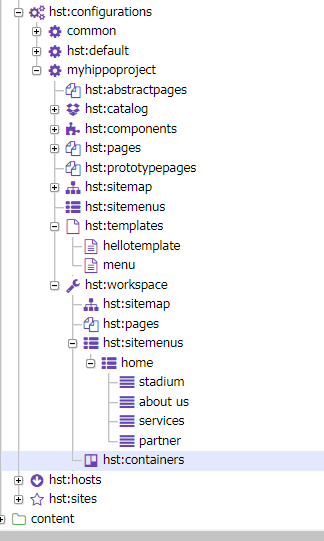
Browse to the node at /hst:hst/hst:configurations/your_Project_Name and you will see something similar to this:
select the hst:templates node. Add a new child node, by either clicking on ‘Add’ in the top menu or by right-clicking the node then selecting ‘Add node’. Name it homepage. The node type should be set to hst:template by default. Click OK to create.

After this, click on the ‘Add Property’ button above the properties. This will open a dialog:

Add a property named hst:renderpath. Set the value to the location of the jsp file you created: jsp/Your_Project_Name/home.jsp
Click OK to close the dialog.
Step 5: Add a Page (Component)
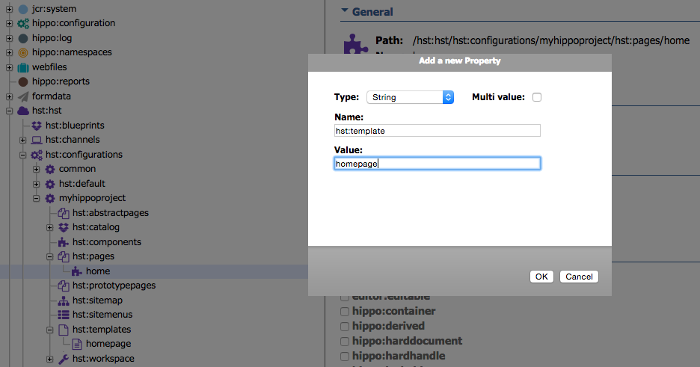
Select the hst:pages node and add a child node called homepage of type hst:component. Note that there is no separate node type for a page, the page node is simply the top level component in the hierarchy.
Add a property hst:template to the home node with the value homepage.
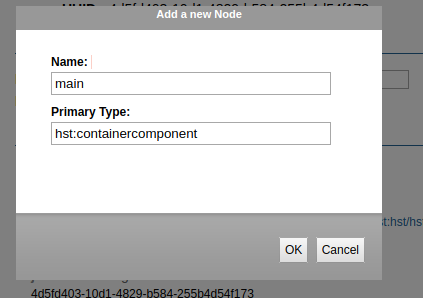
Add a property hst:containercomponent to the homepage node with the value main.
Step 6. Container Configuration
Select the node /hst:hst/hst:configurations/Your_Project_Name/hst:workspace/hst:containers
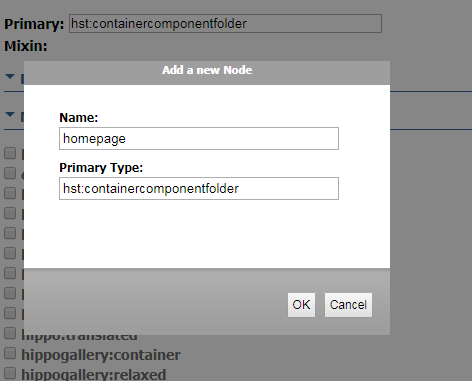
add a child node called homepage of type hst:containercomponentfolder
Select the node /hst:hst/hst:configurations/myhippoproject/hst:workspace/hst:containers/homepage add a child node called main of type hst:containercomponent
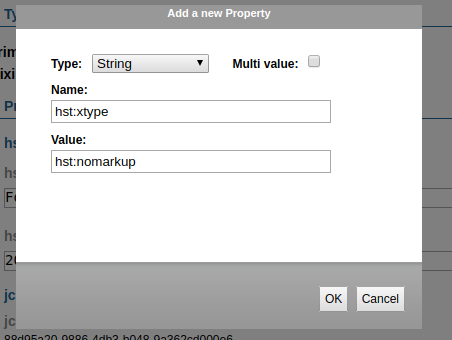
add a property to main of type hst:xtype and value hst:nomarkup
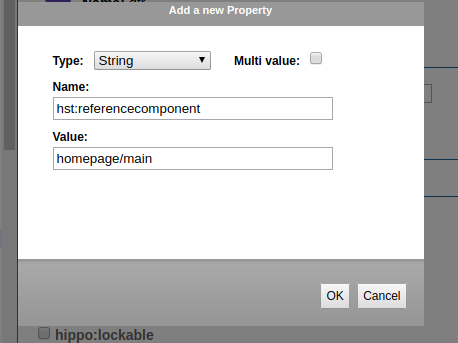
select hst:hst/hst:configurations/Your_Project_Name/hst:pages/home/main node add a property called hst:referencecomponent of value homepage/main
Step 7: Configure the Sitemap
The final step to take is to map a URL to the page you configured. Hippo’s delivery tier uses a sitemap to configure the URL space of a website and map each URL to a page and (optionally) a content item. You want your page to be rendered as the home page of your site, which means you have to add a root sitemap item.
Select the hst:sitemap node and add a child node called root of type hst:sitemapitem.
Add a property called hst:componentconfigurationid and set the value to hst:pages/homepage (referring to the page configuration you just created)
don’t forget to do write changes in repository.
Step 8: Install the plugin from Essentials for Drag and Drop.
go to url localhost:8080/essentials/#/library

click on install feature of Banner, Carousel, Menu, Map, News, Content Blocks, and Events
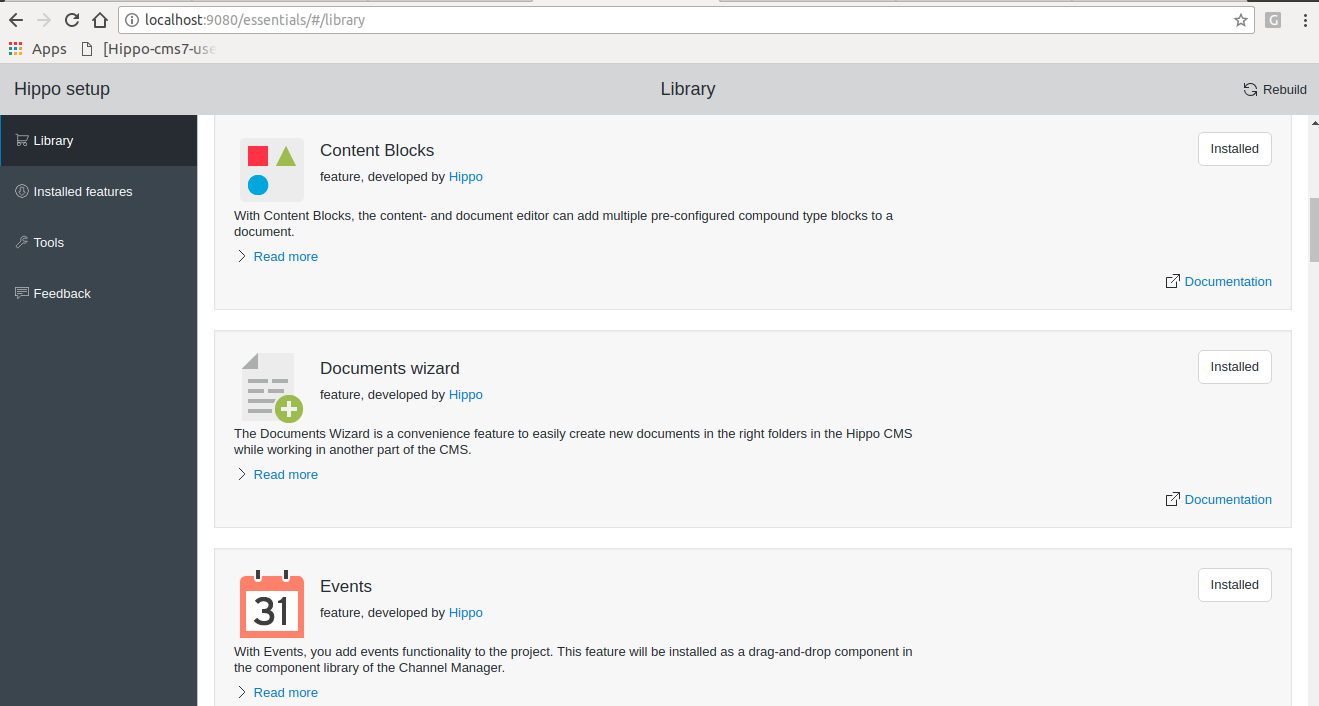
Then rebuild your project
mvn clean verify && mvn -Pcargo.run
after rebuilding your project goto url localhost:8080/cms
Then goto Channels at left Side then click on your_project it will display preview page.
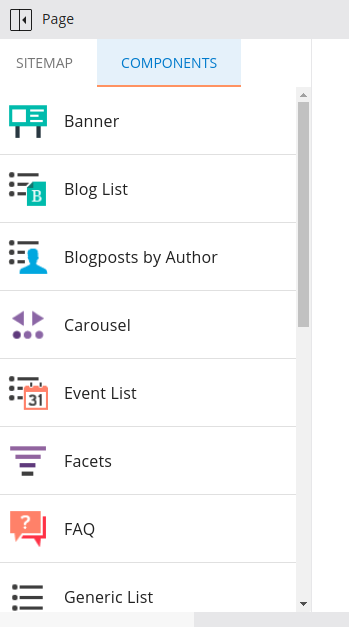
Then click Edit Button after that click top most left icon of sidenav . It will open following screen.
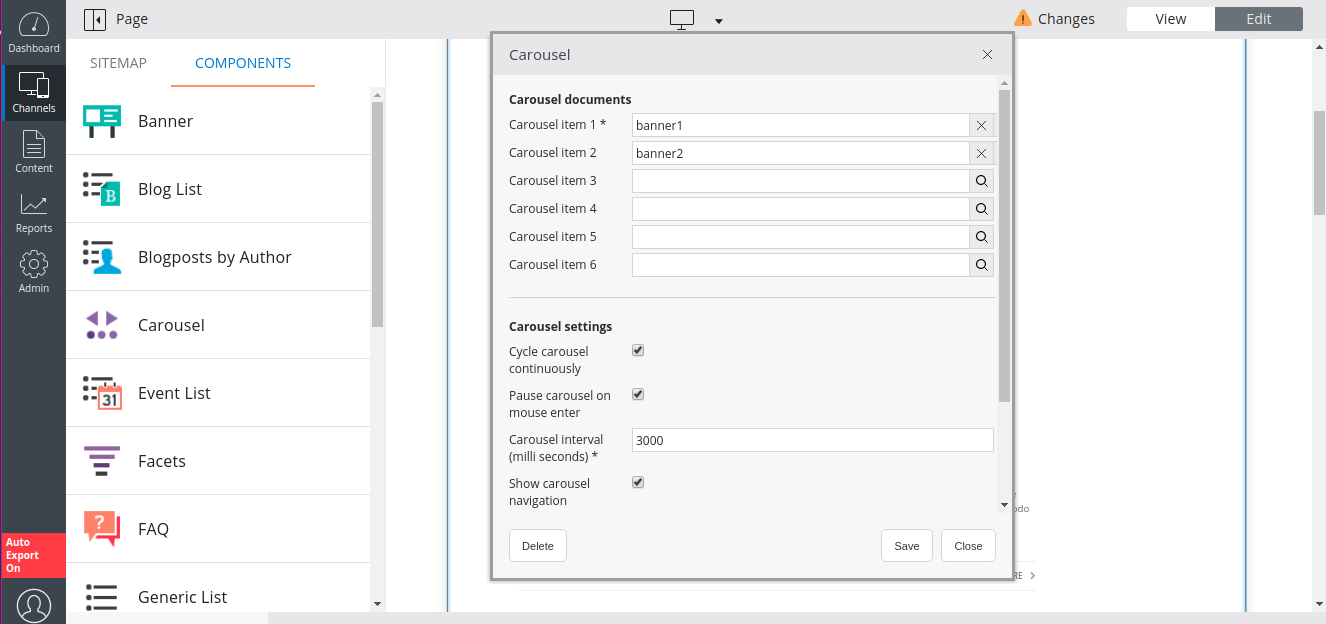
Click on your url on sitemap and then component after that just drag and drop the Banner, Carousel, Faq, News, Map, Events, blogs component to your page.
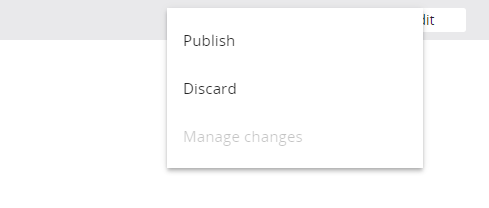
Publish the changes .
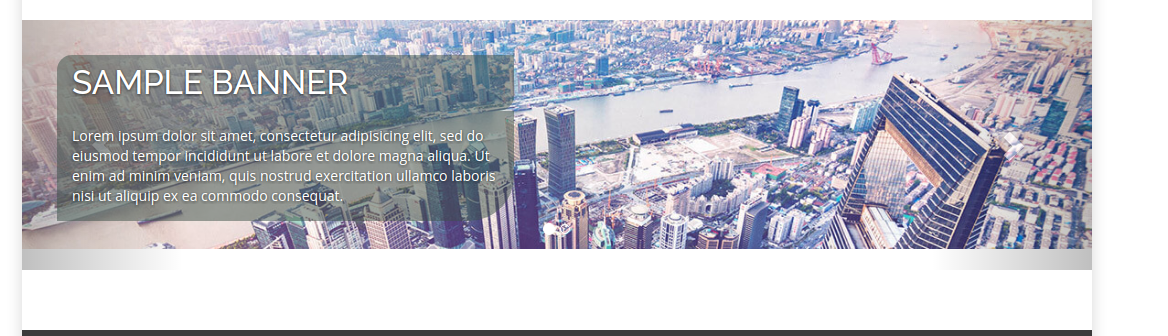
Step 9: Output
visit the site. You now actually see the content being rendered!