How to Create Static Template in Hippo CMS
Step1 : Browse to the bootstrap/webfiles/src/main/resources/site folder and create a folder called freemarker and inside it a folder called home, and add a file called home.ftl to it.
<html>
<head>
</head>
<body>
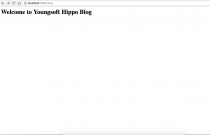
<h1>Welcome to Youngsoft Hippo Blog </h1>
</body>
</html>
Step2 : Paste the following code into the file:
bootstrap/webfiles/src/main/resources/site/freemarker/home/home.ftl
Step3 : Browse to the Hippo Console at http://localhost:8080/cms/console
Step4 : Browse to the node at /hst:hst/hst:configurations/myhippoproject/hst:templates by right-clicking the node then selecting ‘Add node’ Name it homepage. The node type should be set to hst:template by default. Click OK to create.
Step5 : After this, click on the ‘Add Property’ button above the properties. Add a property named hst:renderpath. Set the value to the location of the Freemarker file you created: webfile:/freemarker/home/home.ftl. Click OK to close the dialog.
Step6 : Select the hst:pages node and add a child node called home of type hst:component. Add a property hst:template to the home node with the value homepage.
Step7 : Select the hst:sitemap node and (If already added chlid node as root default then you will select root and modify hst:componentconfigurationid value as hst:pages/home ) add a child node called root of type hst:sitemapitem. Add a property called hst:componentconfigurationid and set the value to hst:pages/home. Click on the ‘Write changes to repository’ button in the top right corner to persist the changes you made
Step8 : Open the site ( http://localhost:8080/site/) to see the home page you created.