

How to create Document Type
What is Document Type ?
Hippo CMS maintains a strict separation of content and presentation. Content is stored in documents. These documents have a clearly defined structure, making it very easy for editors to work with. The separation makes it easy for editors to work on the actual content. No HTML knowledge is required and, best of all, you can reuse the content anywhere.
What is Document ?
Document is the drop down in the top left corner and add a new document to the project. Document provides URL name in the field below. It uses the name to create a URL friendly version of that document editor interface containing the fields we configure for this document type.
Step 1. create document type.
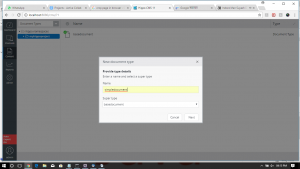
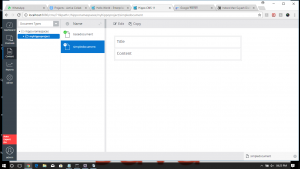
Step 2. create string filed.
Add a String field (Primitive) for our title and set the Caption to Title and Path to title. Next, add a Rich Text Editor (Compound Field) to the document type. Set the Caption to Content and the path to content. After adding the fields, click ‘Done’ and then select ‘Type Actions’, ‘Commit’. The document type is now ready for use in the CMS.
Step 3. create a document.
Select ‘Documents’ from the dropdown in the top left corner and add a new document to the myhippoprojectfolder.
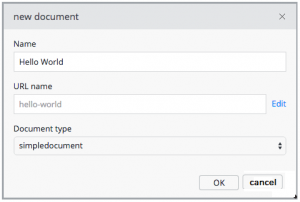
Name the document Hello World. Also, note the URL name in the field below. It uses the name to create a URL friendly version of the document, which is used as the filename. After you click OK, you will be presented with the document editor interface containing the fields we configured for this document type.
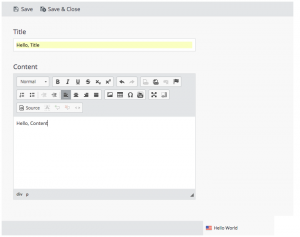
Enter some text in the document fields and click ‘Save & Close’. Then click on the ‘Publish’ option in the ‘Publication’ menu so the document becomes available to the site.
Step 4. create a model.
http://localhost:8080/essentials/#/introduction
select radio button either freemarker or ftl file.
Select Tools in left menu then click Use bean writer then click “Generate HST Content beans” button.
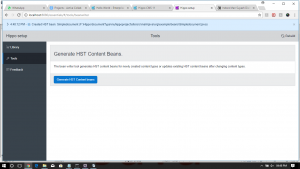
After that bean will be generate.
@HippoEssentialsGenerated(internalName
= "myhippoproject:simpledocument")
@Node(jcrType
= "myhippoproject:simpledocument")
public class Simpledocument
extends BaseDocument
{
@HippoEssentialsGenerated(internalName
= "myhippoproject:title")
public String
getTitle() {
return getProperty("myhippoproject:title");
}
@HippoEssentialsGenerated(internalName
= "myhippoproject:content")
public HippoHtml
getContent() {
return getHippoHtml("myhippoproject:content");
}
}
step 5 :Create a Controller
With the model in place (the content bean wrapping the content), you can now create a controller and implement the business logic to retrieve the content bean and make it available to the view. In Hippo’s delivery tier, controllers are implemented as Java components.
Use your IDE to create a new Java class in the site module, in the package org.example.components, named SimpleComponent. Paste the following code in there:
public class SimpleComponent
extends BaseHstComponent
{
public static final Logger
log = LoggerFactory.getLogger(SimpleComponent.class);
@Override
public void doBeforeRender(final HstRequest
request, final HstResponse
response) throws HstComponentException
{
super.doBeforeRender(request,
response);
final HstRequestContext
ctx = request.getRequestContext();
//

Retrieve the document based on the URL
Simpledocument

document = (Simpledocument) ctx.getContentBean();
if (document
!= null)
{
//

Put the document on the request
request.setAttribute("document",
document);
}
}
}
There is just one method in the class, the doBeforeRender method. This method is called just before the view is rendered, and its purpose is to perform any business logic and prepare any data that is required to render the view.
The example above is a very typical implementation. A content bean is retrieved from the request context, based on the URL (you configure the homepage URL to map to the document you created in one of the next few steps). The content bean is then stored in a request attribute so it is accessible to the template engine when the view is rendered.
Step 6 : Make the view Dynamic
You now have a model and a controller which retrieves it and stores it in a request attribute. Now you can modify your Freemarker template to make the view dynamically render the content wrapped by the model.
Open the home.ftl template again and modify it so it looks like this:
bootstrap/webfiles/src/main/resources/site/freemarker/home/home.ftl
<#assign

hst=JspTaglibs["http://www.hippoecm.org/jsp/hst/core"]
>
<html>
<head>
</head>
<body>
<#if

document??>
<h1>${document.title?html}</h1>
<div>
<@hst.html

hippohtml=document.content />
</div>
<#else>
<h1>Goodbye?
cruel world</h1>
</#if>
</body>
</html>
In addition to the regular Freemarker syntax and expressions, you can use Hippo-specific tags from theHST tag library. An example in the template above is the <@hst.html> tag. This tag will process the data contained in the Rich Text field, ensuring that all internal links are validated and rewritten to the correct URL in the current page context.
You are now done with all the code changes, so stop, rebuild,and restart the project:
mvn verify
mvn -Pcargo.run
Step 6: Configure the MVC Component
After the build is done, go back to the Console to add the newly created
Java component.
Add a new hst:component node to the hst:components section. Call it simplecomponent and after it is created, add a property called hst:componentclassname and set the value to org.example.components.SimpleComponent. You have now added your first reusable component!
/hst:hst/hst:configurations/myhippoproject/hst:components
    + simplecomponent [hst:component]
        - hst:componentclassname = org.example.components.SimpleComponent
Now configure the page to use that component.
Select the home node in hst:pages. Add a property to it named hst:referencecomponent and set the value to hst:components/simplecomponent.
/hst:hst/hst:configurations/myhippoproject/hst:pages/home
– hst:referencecomponent = hst:components/simplecomponent
hst:template = homepage
Step 7: Map the URL to the Content
The template engine currently executes the logic for not having a document present. This makes sense because you have configured your view and your controller, but not yet where to retrieve your model (and thus, your document).
Go back to the console for one last time and select the hst:sitemap node. Select the root node. Add a property called hst:relativecontentpath and set the value to hello-world. This will tell the delivery tier to locate the content at that path, relative to the root folder of the site ( myhippoproject). Here you use the ‘URL name’ displayed while naming your document when you created it. If you created the document inside a subfolder, enter the path like mysubfolder/hello-world.
/hst:hst/hst:configurations/myhippoproject/hst:sitemap/root
    - hst:componentconfigurationid = hst:pages/home
    - hst:relativecontentpath = hello-world
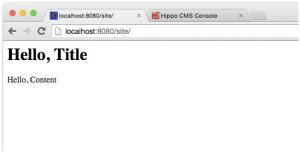
Write the changes to the repository and visit the site again. You now actually see the content being rendered!
Pingback:wwwEdit